Long Haul flight and wheel lacing
My rims and spokes have arrived from Lightfoot Wheels. Wheeley good stuff! Time to get building!
Lesson no.1 or maybe just Captain Obvious. Lacing wheels straight after a long haul flight can mess with your head! It has been more years than I care to think since I last built a spoke wheel. Yet alone since I have built a motorcycle wheel. I arrived home from a work trip late Saturday night. With body clock skewed, I was away really early on Sunday and decided that there was no better time to build my Squariel wheels. The front wheel is a pretty basic 2 cross spoke pattern. That is to say that each spoke crosses two other spoken between the hum and the rim. Phil from Lightfoot Wheels in Melbourne has done a superb job in rolling the spokes and putting the dimples, then drilling the rims. If the nipple holes were drilled to an incorrect angle, the spoke wold bend when tensioned. I have seen this done and it looks naff. Not an issue with my rims. They are beautifully finished.
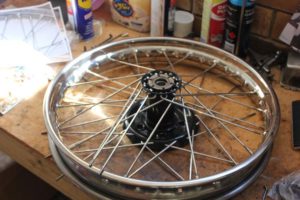
Lacing the rear wheel
Rear Wheel
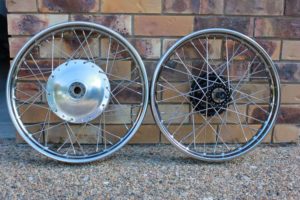
Moving to the rear wheel. The nearside is 4 cross and went together easily. Then I came to lace up the drive side. I just could not get this to work. I eventually conceded defeat, blamed jetlag and walked away. Thinking about it later, I knew that I had done nothing wrong. Something was stopping it from going together. I eventually did the obvious and measured the new spokes. Sure enough, the drive side spokes were longer than the factory spec by about 25mm. Crap! Well, at least I had an answer. My email to Lightfoot was answered quickly enough. Phil had made the spoke and drilled the rim for 3 cross on the drive side rather than the factory 2 cross. His rationale was that it would be a neater and stronger wheel and that nobody would really notice. Except that poor sod trying to build the wheel 2 cross that is! I am sure that some hardened anorak wearing Arielophile will point it out in a car park somewhere as well.
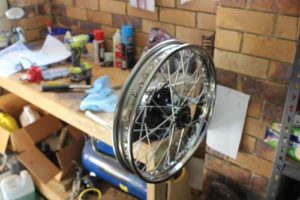
Truing the rear wheel
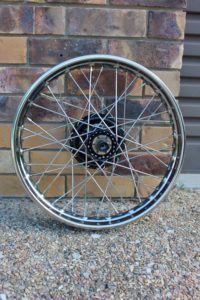
Beautifully Finished
Of course Phil is right. Building it 3 cross drive side has made for a stronger wheel and a more aesthetically pleasing wheel. I am a still not entirely happy that he did this without consultation. That he also missed doing some other work that I asked him to do makes me think that he was a bit under the pump. I cannot fault the quality of his product and his attention to detail however. They really have come out looking splendid. It was well worth spending the extra money going for stainless rims and stainless butted spokes.
Looking wheeley good
Spoke Tensioning
Once the wheels were laced, spoke tensioning and truing the wheels was straight forward. The front one built really quickly and was simple to true. The rear rim has a bit of a dip at the join and was a little bit harder to get true. It came right in the end and again, I am really pleased with how they look.
I have made some video recordings of the wheel building process. I will edit these and get them posted in due course.
Ariel wheels look superb and are beautifully finished
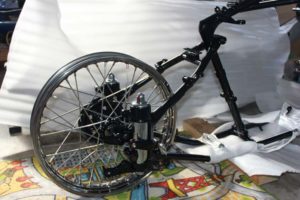
Next Steps
What next? I pick up the fuel tank mid-May. Talking to Jeff at Shiny Bits in the weekend, he has had some fun getting it right. He said that he has given it a lot of time in the copper tank to get some thickness into the panels. I am looking forward to seeing how it comes out.
I am still waiting for some Anstey Link suspension parts on backorder with Drags. It would be good to get those and get that finished.
4GMKII Rear Wheel